
It's not difficult to learn the super detailed steps of home version fried dough sticks
The family version of fried dough sticks has been officially launched. Today, we are going to make a family version of fried dough sticks. Although I can't guarantee that everyone can blow up the empty and fat fried dough sticks as shown in my picture, I will carefully write down each detail more clearly, hoping to help you who love fried dough sticks.At present, there are two kinds of home fried dough sticks, one is yeast version and the other is baking powder. Both of them can be used to make fried dough sticks, but the taste of the fried dough sticks is different. The yeast version may be more powerful, and the meat will be thicker and the skin will not be so crispy. The taste made of baking powder will be closer to the fried dough sticks in the breakfast shop, with empty heart and fat body and crispy skin. Of course, it can't be exactly the same, because our family version lacks many materials that are not available in breakfast shops.Today, what we are doing is baking powder version of fried dough sticks.What is baking powder?Main raw materials of baking powder: soda powder, corn flour.There is no secret to making fried dough sticks at home. I can only make perfect fried dough sticks by doing more and more practice. I don't make fried dough sticks very much. I do it more than twoorthree times a year, but I can hardly make dough sticks by following the above steps.
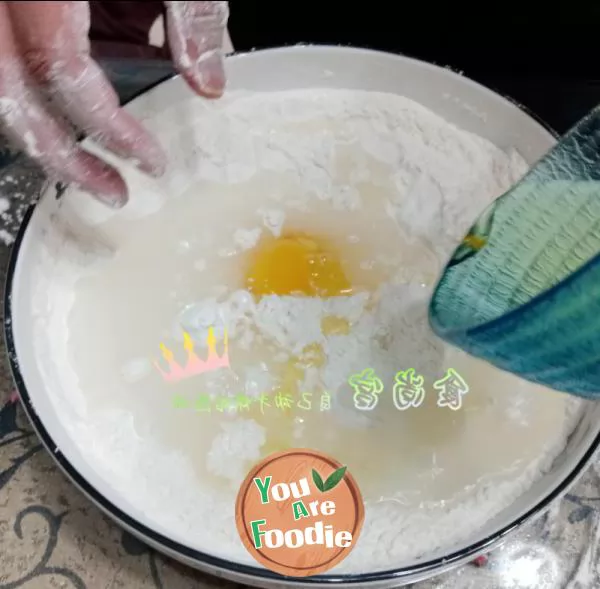
Step 1 . Put flour, baking powder, salt and baking soda into a large bowl and mix them evenly. Then add eggs and edible oil in turn, and finally add water (don't pour all the water at once. Everyone's flour has different water absorption, and reserve about 10 grams. Finally add it according to the situation) [the kneading time is about 10:00 p.m.].
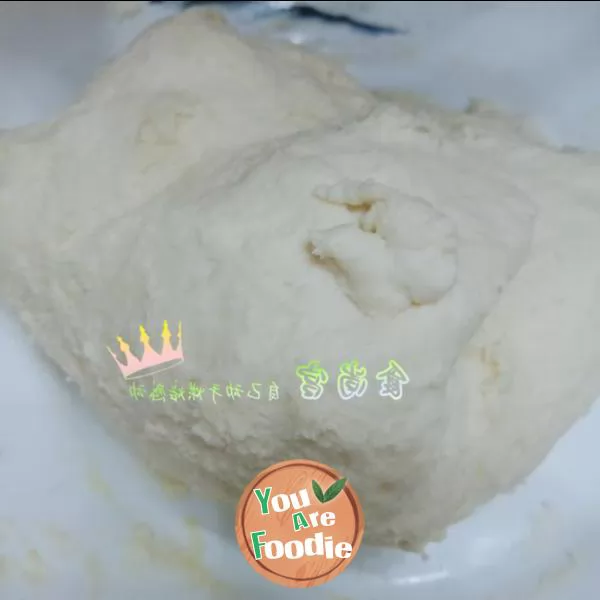
Step 2 . After all the materials were mixed together, we began to knead the dough. The dough of the dough sticks was a little sticky at first, so we operated in the big bowl all the way. This is the dough kneaded into a ball, and the surface is not smooth and sticky. (if your dough is drier than this, add the last 10 grams of water).

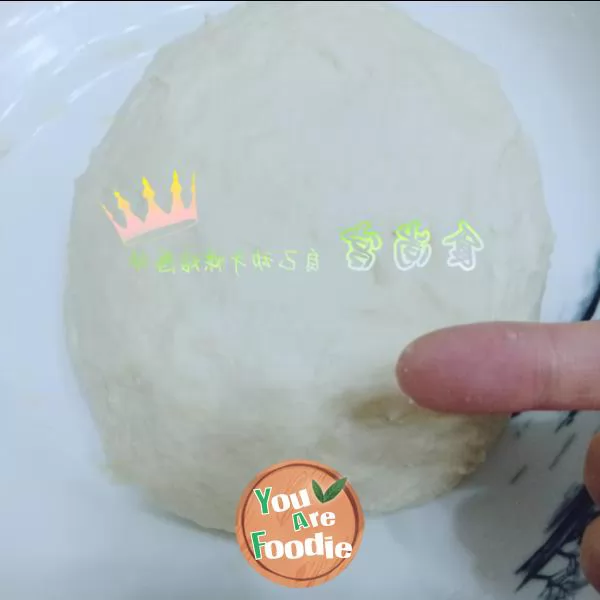
Step 3 . Let's take a look at the details of the dry humidity of the dough. A small piece of dough pulled from the large dough mixed into a dough. If you let go of the medium dough, it can form a dough, but it will also stick to your hands, and at the same time, it will not be too wet to pick it up. This state is the correct state.
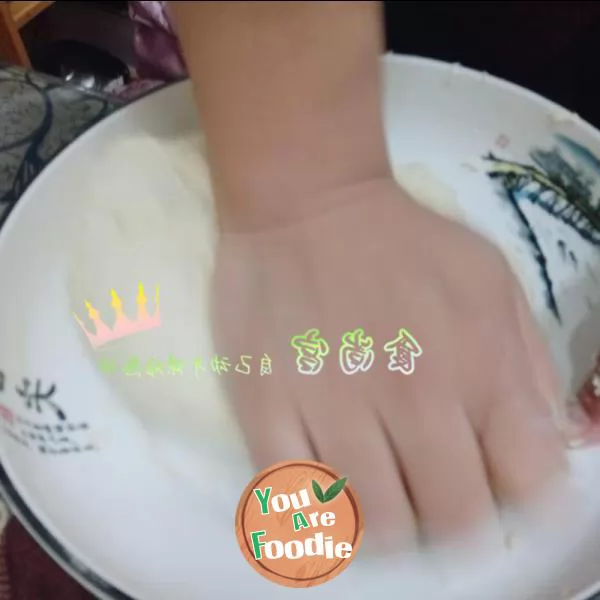
Step 4 . Although the dough is sticky now, please don't add flour or oil without authorization. Just continue to knead hard and try to knead it for a few minutes. If it's really sticky, just stand still for a minute or two and then knead it for a few minutes.
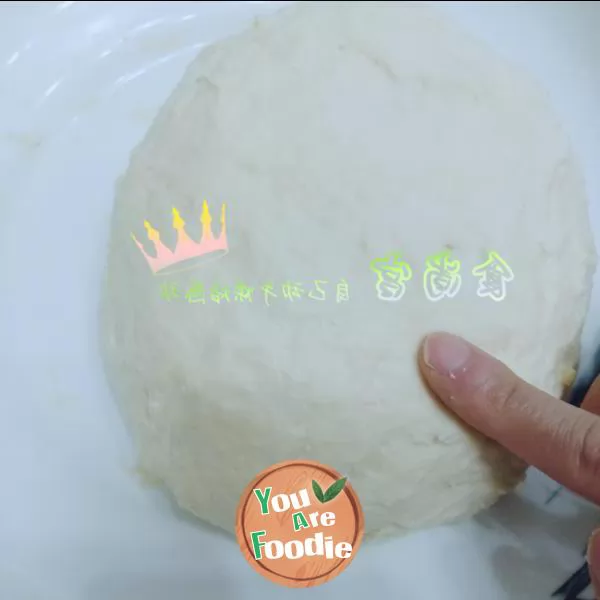
Step 5 . After kneading for about ten minutes, it was obvious that the dough was stiffened. Although it was not smooth, it was not so sticky.
Step 6 . Notice that in the previous picture, we press the dough with our fingers. In this picture, we check whether the dough sticks to our fingers. Obviously, it doesn't stick to our fingers. To this extent, the dough is basically kneaded.

Step 7 . After the dough is kneaded, seal the mouth of the bowl with plastic wrap, and then put it on the layer of the refrigerator (with eggs), wake up overnight, and get up the next morning to fry fried dough sticks.
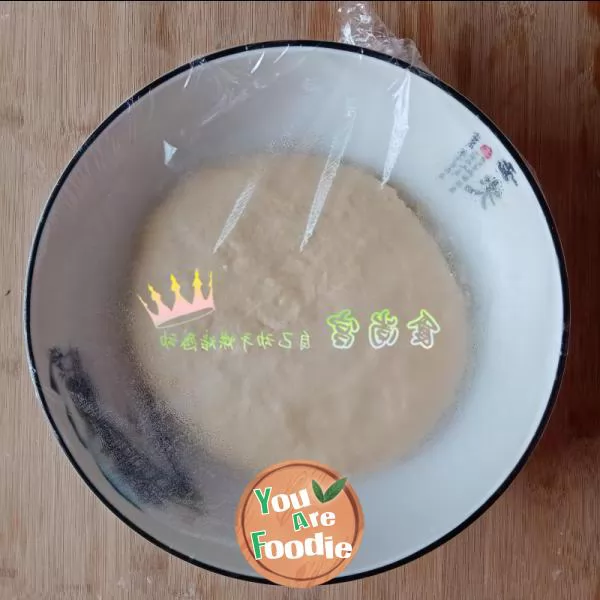
Step 8 . Take out the dough that has been awake all night from the refrigerator for standby (Note: the dough with baking powder will not become larger, and there is no doubt why the dough is the same size as yesterday) [take out time: about 7:00 in the morning of the next day].

Step 9 . Take out the dough gently. Don't knead it with your hands after taking it out. Although it's very imperfect, it doesn't need to be perfect, you can stretch it gently with the help of your hands.
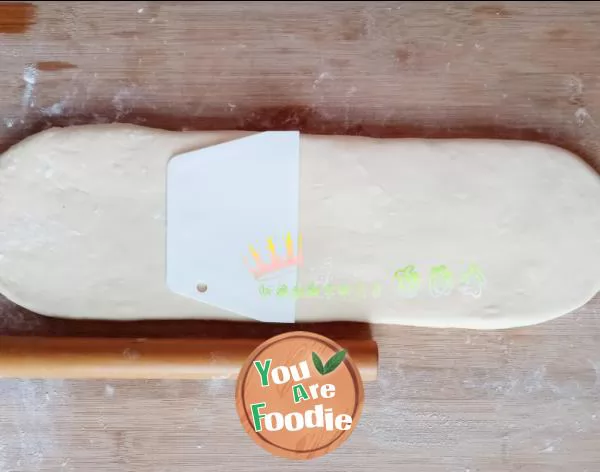
Step 10 . After the dough is a little longer, we first cut it horizontally into two, because there is more flour in 500g, which is difficult to operate in general families.
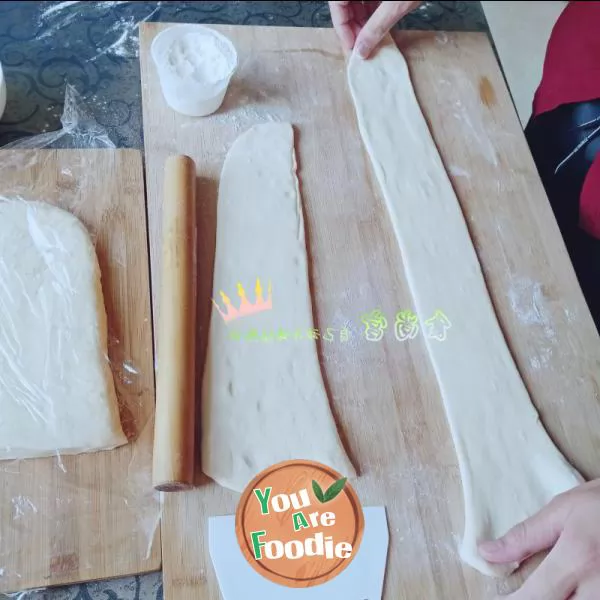
Step 11 . 01 after the dough is divided into two, one of the dough is temporarily covered with plastic wrap for use. 02 we cut another piece of dough vertically and divide it into two. After cutting, we also use hand force and rolling to elongate and roll it into thin slices. When rolling the slices, we must be gentle. The dough is very flexible and difficult to operate. We don't have to have the same size at both ends. Gentle operation is not neat. If violent operation, it will only become a dough stick. Pay attention to the picture.
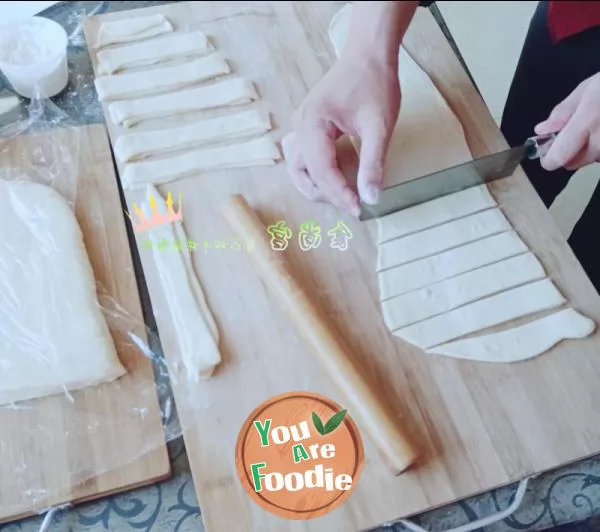
Step 12 . Roll the thickness of the deformed dough piece to about 1 yuan coin. If you stick your hands halfway, please sprinkle flour instead of oil. Roll out a piece of dough and cut it. The width is arbitrary. I usually have two fingers wide.
Step 13 . In order to prevent the two pieces of dough from exploding when frying, I put a little water in the middle, and then find two pieces of dough with roughly the same length to overlap. (I can't let you make perfect fried dough sticks with the same length, but try not to fry them into dough sticks.)

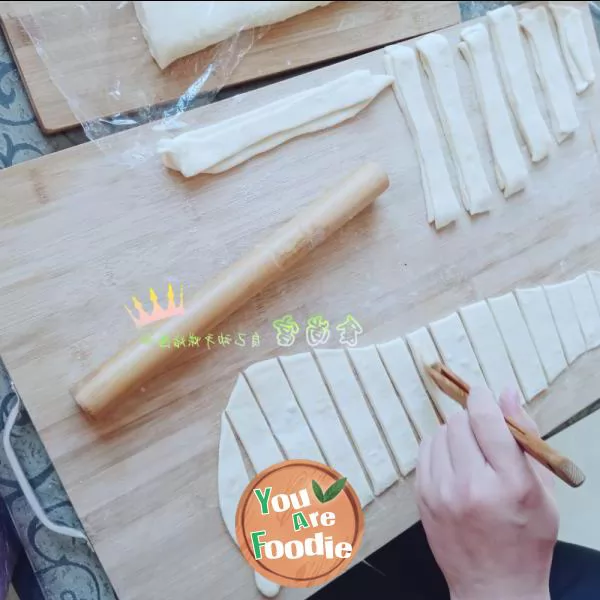
Step 14 . With the help of hand power or a rolling pin, all operations of rolling, cutting, watering and stacking are completed in turn. (Note: pull slightly after each lamination is completed, because it can't be pulled again when it's officially fried)
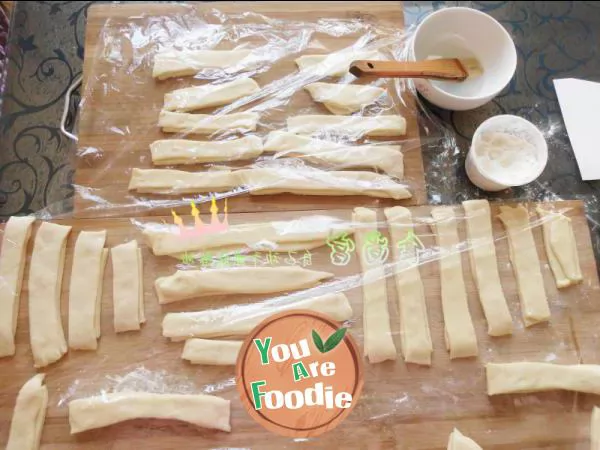
Step 15 . After all the dough sticks are cut, folded and pulled, the fresh-keeping film on the back cover is kept still for about 30 minutes.
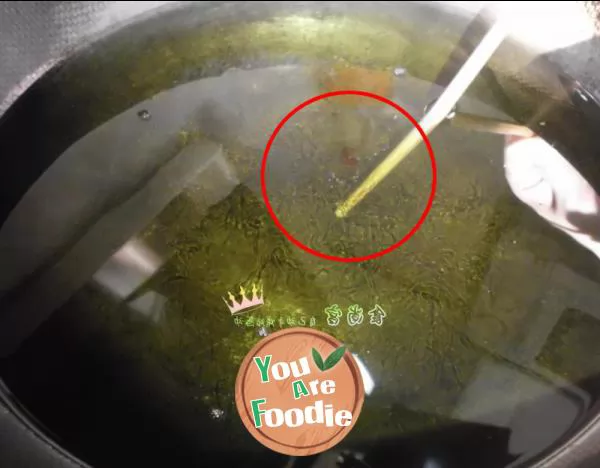
Step 16 . Pour oil into the pot and heat it. 02 prepare two bamboo chopsticks. 03 after the oil temperature rises, insert a bamboo chopstick into the oil pan. After obvious small bubbles are visible in one second, insert another bamboo chopstick into the oil pan. Obvious bubbles are also visible in one second, indicating that the oil temperature rises. On the contrary, you need to wait until the above situation occurs. After the oil temperature rises, we first turn down the fire by about half and let it maintain this temperature. If we don't turn down the fire by half, the oil temperature will burn higher and higher.

Step 17 . Because the dough sticks have been brushed with clean water, you don't need to press the surface with chopsticks. At the same time, don't pinch both ends, and don't pull the dough sticks, twist fried dough twist and other actions. Just put them into the oil pan directly. After the dough sticks are put into the pot, you should use chopsticks to turn over the dough sticks constantly. Don't just fry one side, and the heat on the other side will kill it. If you still can't grasp the problem of oil temperature before embryo, you can try the oil temperature in a small corner to see the finished product. (because there is no sugar, milk or butter in the dough sticks, they won't be colored at the beginning of frying. Don't doubt it's the heat. After frying, they will naturally turn beautiful golden yellow. If sugar or milk and butter are put in the dough sticks embryo, the finished products of the dough sticks will be over colored and appear burnt yellow.)
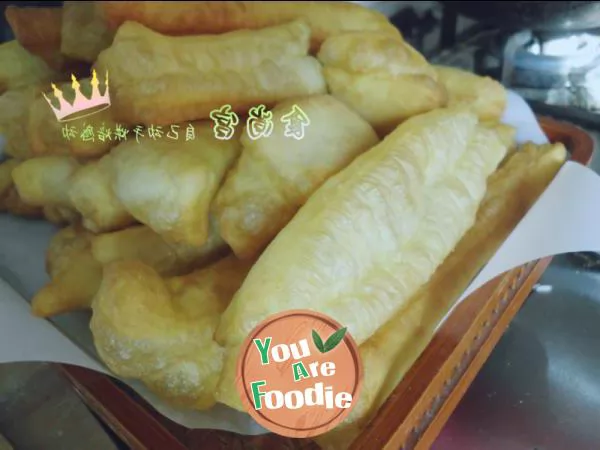
Step 18 . Follow the above steps to fry all the dough sticks in turn. If you encounter one problem or another halfway, please think carefully about whether you are not sure about the details.
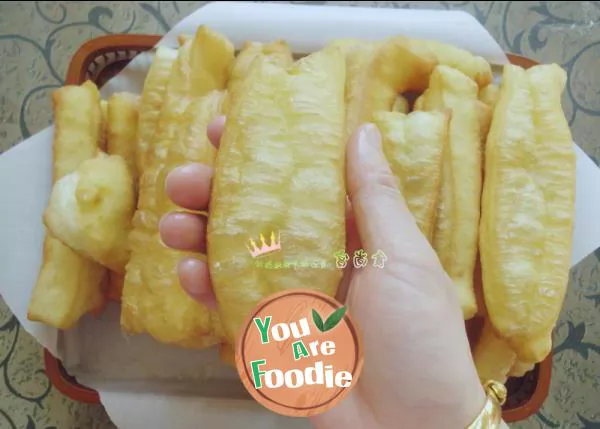
Step 19 . Considering the limited diameter of household frying pan, our fried dough sticks will not be too long. This is a kilo of flour, which can be used to make more than 20 small fried dough sticks.
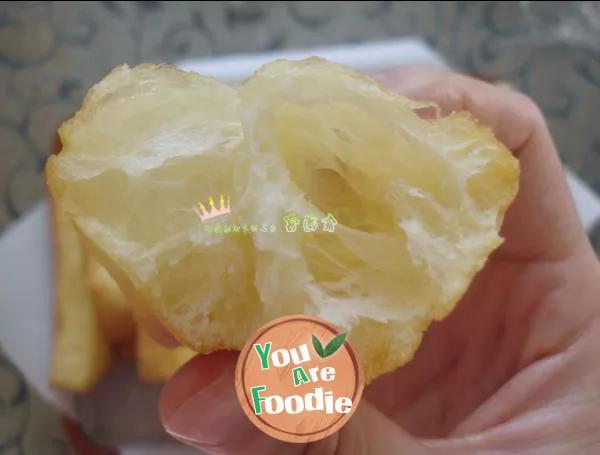
Step 20 . Well, this fried dough sticks is over. Let's have another slice.
* Information is provided from the Internet, If there is a copyright infringement, Please contact administratoryouarefoodie.com, We will deal with as soon as possible, Thank you!
![[peach and plum cooking] the pickled cucumbers are so delicious that they won't change the meat!](/update/images/foods/9/6509/46509/1653464716_858770.jpg_s.jpg.webp)